How to Add Subtle Architectural Lighting to a Deck or Patio
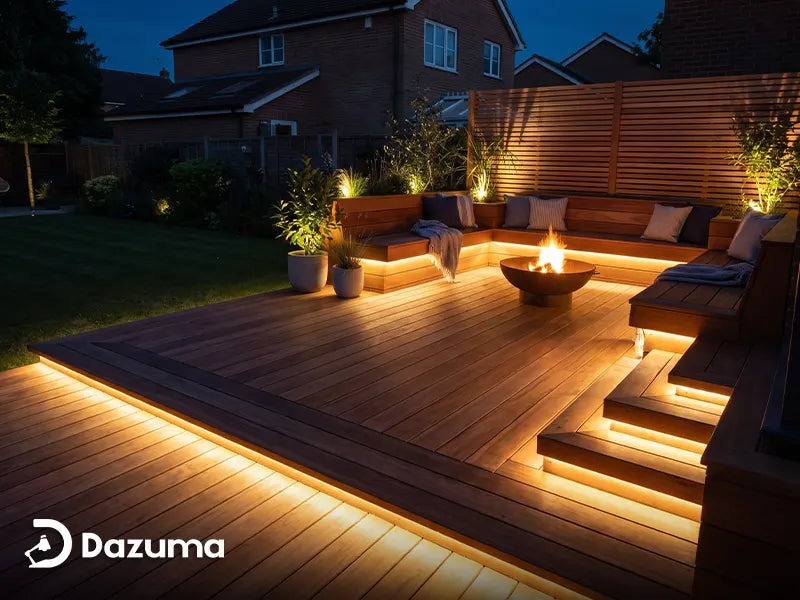
Outdoor renovations often focus on surfaces, furniture, planting, and shade. Lighting is added near the end, sometimes as a single bright fixture beside the back door. That approach makes the area visible, but it rarely creates a polished atmosphere. Linear accent lighting offers a different option. Installed beneath steps, railings, benches, or counters, it can reveal the shape of a space without filling it with bulky fixtures. The result works best when the light source remains discreet and every illuminated line has a purpose.
Begin With the Effect, Not the Product
Before measuring or shopping, decide what the lighting should accomplish. It might guide movement down a short flight of steps, define the edge of a deck, illuminate an outdoor kitchen worktop, or add a soft glow beneath built-in seating. These are different jobs and may need different brightness levels, mounting positions, and controls.
Walk through the area after dark using a portable light. Notice where people slow down, where the surface changes level, and which architectural lines deserve attention. Mark only the locations that improve safety, function, or visual structure. Covering every edge with light can make a residential garden resemble a commercial venue and remove the contrast that gives an evening setting depth.
Combine Accent Lighting With Other Layers
A linear system should not carry the entire lighting plan. Use a wall fixture near the entrance for general visibility, focused task light around cooking areas, and low-level illumination for routes. Accent lighting then connects those zones or highlights selected details. This layered approach allows each fixture to operate at a comfortable level instead of relying on one source to do everything.
Choose Products Made for Exterior Conditions
Indoor adhesive tape lights are not designed to cope with rain, condensation, ultraviolet exposure, dust, and large temperature changes. A covered patio may appear protected, but wind-driven moisture and humidity can still reach electrical components. Check the product’s stated location rating, operating temperature, power requirements, and installation instructions for the exact position.
Dazuma’s collection of Outdoor Led Strip Lights includes flexible and waterproof-oriented options for exterior applications such as steps, walls, and landscape accents. Homeowners should still verify the specifications of the individual model rather than assuming that every design has the same level of protection or can be installed in standing water.
Measure the Complete Route Before Buying
Measure each illuminated run separately and identify corners, breaks, access points, and the planned position of the power supply. Do not calculate only the visible length. Connections and cable routes also need space, and some products can be cut only at marked intervals. If a strip is cut, the new end may require an approved cap and sealant to restore weather protection.
Long runs can experience voltage drop, causing the far end to appear dimmer or change colour. The solution may involve parallel power feeds, a higher-voltage system, or dividing the project into shorter circuits. Follow the manufacturer’s limits and consult a qualified installer when the layout extends across a large deck, fence, or garden structure.
Hide the Source and Show the Glow
The most convincing installations reveal light rather than individual diodes. Position the strip beneath a lip, inside a recess, or behind a trim so it cannot be seen directly from normal seating and walking positions. A compatible aluminium channel with a diffuser can help create a smoother line while protecting the strip and supporting heat management.
Before fixing anything permanently, hold a short section in place and view it from several angles. Check it while standing, sitting, approaching from the garden, and looking through the house windows. A source hidden from one direction may produce glare from another. Testing prevents an attractive daytime detail from becoming a distracting bright line after dark.
Use Mechanical Support Outdoors
Adhesive backing alone is rarely a dependable long-term mounting method outside. Dusty masonry, treated timber, humidity, heat, cold, and natural material movement can weaken the bond. Use the clips, channels, or brackets recommended for the product and substrate. Stainless or corrosion-resistant fixings are generally preferable where exposure is expected.
Keep the run straight without pulling it under excessive tension. Allow for the minimum bending radius specified by the manufacturer, particularly around corners. Sharp folds can damage conductors or the waterproof sleeve. Connections should remain accessible for inspection instead of being permanently trapped behind finishes that would need to be destroyed during maintenance.
Plan the Power Supply as Carefully as the Visible Light
The driver, controller, plugs, and junctions are part of the exterior system even if they remain out of sight. They need appropriate protection, ventilation, and access. Do not place a power supply in a sealed box unless it is designed for that enclosure, because heat can shorten component life.
Any connection to mains electricity must follow local electrical requirements. Outdoor receptacles and circuits may require specific protection, and a qualified electrician should handle work beyond safe plug-in or low-voltage installation. Never route cables where they can be cut by garden tools, crushed by furniture, or submerged by drainage problems.
Select a Colour Temperature That Suits the Materials
Warm white light usually complements timber, brick, terracotta, and relaxed seating areas. Neutral white may suit contemporary concrete, stone, or a task-focused outdoor kitchen. Strong blue-white light can make planting and warm materials appear harsh, especially when used at high brightness.
Consistency matters more than selecting one supposedly perfect number. Compare the planned strip lighting with existing wall lights and landscape fixtures. If the colour temperatures are noticeably different, the patio may feel visually fragmented. Dimming is also valuable because accent light that looks subtle at dusk can become overpowering once the sky is fully dark.
Use Controls to Match Different Activities
A patio does not need the same scene for cooking, entertaining, and quiet late-night use. Separate circuits allow step lighting to remain on while brighter counter illumination is reduced. Timers, dimmers, and compatible smart controls can simplify daily use, but every component must match the electrical system and environmental conditions.
Respect Neighbours and the Night Environment
Low energy consumption does not automatically make a lighting plan responsible. Aim light towards surfaces, keep output as low as practical, and avoid creating bright lines visible from neighbouring bedroom windows. Concealed downward-facing illumination usually provides a calmer result than strips aimed outward across the garden.
Compare the Whole System, Not Just the Strip
When reviewing options from Dazuma Lighting or another supplier, compare the complete set of required components: strip, channels, connectors, controller, power supply, mounting hardware, and replacement availability. A low initial price may be less attractive if the system needs incompatible accessories or cannot be repaired in sections.
Finally, inspect the installation each season. Clean diffusers, check clips, look for water around connections, and trim vegetation blocking the light. Thoughtfully planned linear lighting should remain visually quiet. When the mounting, power, colour, and brightness are handled correctly, the deck feels safer and more refined without the lighting itself demanding attention.








Post Comment